RSS

Prism Kites Review and Giveaway

(note: we’re switching over some things on our blog today and having a few problems.  If you cannot see a comment section for this post, please comment in the post below to enter the giveaway.  Thanks for being patient with us)

Today, on day 1 of our 12 part series of the 12 Days of Outdoor Christmas we will are excited to announce Prism Kites.  As I kid, I loved flying kites and seeing how far I could get them to go up in the sky.  Now Prism has taken that feeling and notched it up 20 times by giving us kites that are a lot more interactive, can go crazy fast, pull you hard, do sweet tricks and give us the opportunity to turn a windy day into an exciting, adventurous day. Definitely something we appreciate at Bring The Kids.

Besides making sweet kites, Mark – the President at Prism Kites, exhibits the Bring The Kids philosophy with his own family.  Last summer, he and his wife took their 1 year-old on a month long trip flying their small plane to remote sections of Alaska! He said that it took a lot more work and preparation then prior trips before they had their daughter, but was well worth the effort. So needless to say, we’re excited to showcase and review a fun product from a family that shares our love for adventure and enjoying the great outdoors.

So let’s get on with our review and the sweet give away of a Prism Quantum kite.

We’ve had our Prism kite for about five years and have really enjoyed it. This is a great beginner/intermediate trick kite. We got a few of the kites from a trip to San Diego and get to pull them out on windy days and take them along on a lot of our adventures. We end up throwing it into the back of the car with the rest of the camping gear when we head out on a trip and if the winds are good, we enjoy pulling it out and playing around.

The kite is straight forward to use with two strings with handles and a tough kevlar-reinforced nose.  I’m sure this feature alone has saved our kite from crumpling into a heap as we were trying to master the art of flight as we first began.  In the picture below, we are showing the kite before set up, the carrying case and the strings

Here is a close up of the strings and the handles you hold on while flying.

The assembly of the kite is quick and easy.  The frame is made of graphite poles, and each has a solid sleeve or joint to attach to.  Once assembled, the kite is solid and designed to catch the wind well.  Taking the kite apart isn’t hard, but is more effort than putting it together.  Some of the joints can get a little sticky when you’re trying to pull them apart, which gives me confidence that they are going to hold up, but a little frustration if it is hard to pull apart to get it put away.

When first learning, also make sure that you aren’t around people.  Soon after we got the kite, we were figuring it out when some girls approached with curiosity. As can easily happen as you are learning the ropes with the spins and tricks, the kite went out of control and did fast nose dive straight into the ground closer than I’d like to the girls.  Needless to say, with the speeds that the kites can go, I recommend heeding their warning to not fly it around people.

One feature that I haven’t had to use much is the ability to adjust how the strings attach to the kite to adjust for the wind speed.  You can simply loosen the loops attached to the kite and slide them to the outside or inside depending on the wind strength (the black tabs in the window below say Light Wind or Strong Wind to let you know which way to adjust).  Most of the wind we’ve used it in isn’t really strong, so we haven’t had to play around with this much.

Quick adustments depending on the wind speed and your desired level of control

Check out our video from playing around with our Quantum: Attack Kite

Pros:

  • Small and compact – It is extremely easy to take on our adventures
  • Sturdy – We’ve crash landed too many times to count, including some heinous nose dives
  • Fun for the kids – As seen in the video above, our kids enjoy it every time we pull it out
  • Quick set up time – easy to put together

Cons:

  • Some of the connections stick when dismantling the kite.  I’ve had to pull pretty hard to get the graphite poles to separate from the rubber connectors.  You know they are sturdy, but can occasionally be tricky to get apart.
  • Jessica has had a harder time getting the nuances of directing the kite and learning some of the tricks.   Some days she thinks that she might accidently dive bomb the kite with it’s Kevlar tip into her leg (she’s kind of crazy like that).

If you do end up getting a Prism kite, make sure to check out the Pilot’s Lounge on the Prism website for tips on getting started and directions on how to do the tricks.

Now onto the giveaway:
1.  Leave a comment telling us your dream family vacation.  If your email is not linked in your profile, please leave it in your comment so we can contact you.

Bonus: For an extra entry, ‘like’ Bring The Kids on Facebook and come back and tell us that you did.

This give away will be open until 11:59 pm on Wednesday, December 7th. Hope you enjoy!

 
Leave a comment

Posted by on November 21, 2011 in Misc


We wish you a Merry Christmas

I know, it’s not even Thanksgiving yet.  Well, here at Bring the Kids, we’ve had Christmas on the brain for a while.  We’ve been busy preparing something extra fun for you (well, we hope you think it is).

We wanted families to see that Christmas gifts are an amazing thing that can bring you together for the rest of the year.  As our gift to you this year, we wanted to share some products with you that we feel can really help families have great adventures.  These adventures will undoubtably have a far greater impact on you than the latest fad toy, and will probably be much more fun.

12 products, 12 reviews, 12 giveaways.  It’s the 12 Days of Outdoor Christmas!

For the next 12 days, we will be reviewing products that we really feel can help families get out on some awesome adventures this year and beyond.  To top it all off, each product will be accompanied by a giveaway.  That’s right!  Spread the word this is going to be AWESOME!  Hopefully this series will help you think of what you can give this Christmas to help your family have an awesome year full of fun!

There will be lots of chances to enter to win these great products, so check back each day.  Also, for those of you with a blog, here’s an extra chance to get 2 extra entries to use any time during the series.  Simply post about our series on your blog and link back to us.  To enter, just write “Bonus blog entry #1 (or 2)” and put a link to your blog.  Thanks!

Let the fun begin!


Leave a comment

Posted by on November 21, 2011 in Misc


Friday Fun Video: Amazing Surfer Girl

Check out 13 year old Lucy showing off her mad surfing skills.  She’s not only got skills, but she must be one brave kid.  Seriously, I’m constantly amazed by all these kids who put their minds to doing such amazing things.  Way to go Lucy!

Friday fun video is a weekly series where we post videos of kids doing amazing things.  Watch them.  Be Impressed.  Be inspired.  Get out and play!

 
Leave a comment

Posted by on November 18, 2011 in Friday Videos


5 Tips for Taking Great Outdoor Portraits

Today, we’re thrilled to have Tony Murray guest posting for us.  Tony is an extremely talented photographer who is most well known for his landscape photos.  He has won numerous photo contests and has had several photos featured in Outdoor Photographer.  Although he would never admit it, he’s also amazing at taking pictures of people.  He is incredibly skilled at using natural elements and lighting to enhance his portraits, and we’re thrilled to have him with us today.  I’m sure if the rest of you are like us, you’re always looking for ways to capture the beauty that you see in your family and in nature, on film.  Tony is here to show us how!  He also happens to be Mason and Chloe’s uncle (lucky).
He is currently working on an amazing project that you can read about here.  

As a photographer I am often asked how to take better photos, especially outdoors.   To be honest, there is no one thing that is going to make you a better photographer except taking thousands of photos and learning from your errors.  However, there are lots of tips and techniques that can easily turn a regular snapshot into a great photograph.  Here are a some of my best tips:

#1.  The first and most important thing when taking portraits, no matter if you are indoors or out is to focus on the eyes.  The first thing people look at when viewing a portrait is the eyes and so as the photographer you should always focus on them to make them as sharp as possible, making the person in the photograph appear to be looking out.
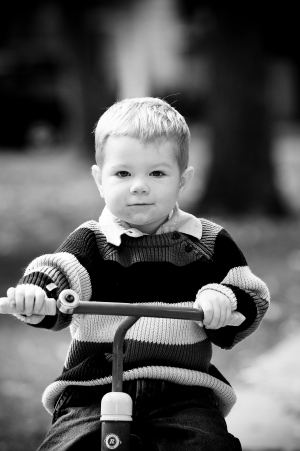
TMP_1698

#2.  The second thing that can help to make a great portrait is to use a wide-open aperture on your lens to create a shallow depth of field.  When viewing portraits we want the subject to stand out from the background, not blend into it.  For example, if I were at a busy park taking photos of Mason and Chloe I would want to see them in the photos and have the background out of focus. I wouldn’t want to see the crazy family reunion at the same park and have those people in all my photos.  To achieve this shallow depth of field open your aperture to the widest it will go, typically an f/stop of f/1.8-f.3.5.  You can also achieve this look by using a telephoto lens and while standing further back zoom in on your subject.  Either way you do it a shallow depth of field is key when taking portraits.

#3.  When shooting portraits the mid-day sun is typically not your best friend, there are often harsh lighting elements or shadows and too much contrast.  So making the best time to take photos to be in the early morning or late afternoon.  This however is not always possible, especially when you are out with the family and just want to take some photo NOW.   Taking advantage of overcast days or utilizing shade can simply fix this.  Clouds and shade act as nature’s light diffusers, allowing for nice, even lighting that you can take photos in any time of the day.
TMP_0134

#4. The fourth, and most misunderstood aspect of outdoor portraits is to use a flash.  For over 90% of my outdoor portraits I use a flash, seriously.  Using a flash, even in the day, can even out lighting, acting as a fill light.  It also helps to separate your subject from the background.  The pop-up flash on your camera is effective to about 15-25 ft depending on ambient light, and can its power output can easily be adjusted in your menu if it is producing too much or too little light.  There are also external flashes that allow for more effective, higher quality light that has the option with most cameras to be fired off camera, allowing you to have a portable portrait studio wherever you go.
DSC_0002

#5. The last tip I have is to use the environment.  Use whatever you have available to you to add to the context of your photo.  Whether you are in the city, in the country, or in the mountains you can use your environment to add depth to your photo, giving it a new feel and look.
TMP_1383
While all these things will help, the best advice I can give is to just shoot.  In the age of digital cameras it doesn’t cost you anything if you spend a couple of hours, taking 1,000 images, and none of them turn out, but you will learn and the next time your photos will be that much better.

Thanks for sharing with us Tony!  Check back in the next few weeks as Tony shares more great photography tips with us!  To view Tony’s portfolio, visit his website here.  

 
1 Comment

Posted by on November 16, 2011 in How to, Photo of the week, Tips


Photo of the Week: Snow Day


Isn’t it great how many little kids you can fit onto a sled?  The more the merrier!

(despite what Chloe’s face would like you to believe)

 
Leave a comment

Posted by on November 15, 2011 in Photo of the week


Tags:

Why we love Arapahoe Basin

There are certain places around us that seem to somehow be stuck back in time.  Places where technology and renovations have been put on the back burner, to allow the soul of the area to permeate you.  A-Basin is one of those places, and that’s why we love it.  Growing up, it was known as the hippie resort.  The place where people would live in the parking lot for the season and where you could always find someone grilling out of their trunk.  Where families where more concerned about spending time together than spending money.  Luckily, it’s still that way today!

If you were to drive up to A-Basin, you might be tempted to keep going and not stop.  The old a-frame lodge and scraggly beards might be enough to scare you away.  Don’t be deceived though.  If you kept driving, you’d miss some of the best terrain and friendliest people around.

Photo courtesy of arapahoebasin.com

When Mason was born, skiing changed for our family.  No longer could we just ski all day, eat lunch on the lift, and ignore the rest of the resort.  We started to spend a lot of time in the lodge as we were taking turns watching him.  We skied at all our usual I-70 resorts like we always had, but were somehow treated differently.  Most of them didn’t care when we came in for 30 minutes to warm up, but staying all day was another issue.  We wanted a place where we could feel comfortable staying with him without the stares and comments about us buying something else if we wanted to stay in their lodge.  It was annoying and uncomfortable.  Not only that, by the time we found a suitable place to hang for the day, we would have to take several lifts to get to the good skiing – much harder when you only have a few precious hours to ski.  One by one, resorts started to slip from our radar of ‘family skiing’.  Finally, we tried out the old hippie resort.  It was like we were a match made in heaven.  We went in the a-frame lodge and quickly found ourselves surrounded by other families like us.  Families trying to still maintain their passion for skiing while they had kids.  Not only that, but there were things set up by the resort for the kids to play with.  LOVELY!

As soon as we started skiing there, we remembered how blissful the Pali lift can be.  Steep, steep, steep, with a few cliffs thrown in there – just what we were looking for.  And, to top it all off, it starts right out of the parking lot so we weren’t spending all our time on ‘connector’ lifts.  We happily skied there for the rest of the season.  The next year, when Mason started skiing, we loved A-Basin even more.  The Pali lift is right next to the beginner lift and magic carpet.  We had everything we wanted all right together.  And of course, we could always just leave the massive amount of gear we brought, in the lodge while we played, knowing it would be right where we left it when we came in for hot chocolate.  Yes, our family found the match we were looking for when we started to ski at A-Basin.


Photo courtesy of arapahoebasin.com

Here are a few other perks that we love about skiing there:

  • A few new high-speed lifts in the last few years
  • It’s not very crowded.  Lift lines are more the exception than the rule.
  • All the staff are friendly and just happy that we brought our kids up for the day!
  • There’s a microwave in the lodge so we can enjoy a warm lunch.
  • The hippies, that have been skiing here for years, will always lead you to a great powder stash.
  • Awesome terrain for everyone from beginners to experts!
  • We can get there in just over an hour from our house.
  • The food prices won’t clean out your bank account.
If you haven’t tried it, check it out.  Or better yet, drop us a line and we’ll meet up with you and enjoy a day of steeps, kids, and hot chocolate with you!
 
2 Comments

Posted by on November 14, 2011 in Skiing


Tags:

Colorado Ski Deals

For those of you in the Denver area, I wanted to tell you about a great chance to get used ski equipment for your family.  This weekend, Larsons Ski shop is hosting a great ski swap.  It’s an awesome place to get used skis, boots, etc.  We’ve been several times and have found some great things – details here

Also, this is pretty much your last chance to get some killer deals on ski tickets:
Arapaho Basin will be selling 4-packs of full transferable tickets for $139 more details here
Loveland will also be selling 4-packs there for $119 – more details here
These 2 deals are easily the best deals around if you’re thinking of getting to the mountains this year.  At both of these resorts, kids 5 and under ski free.  If you’re looking to ever ski with anyone, our family will be skiing at A-Basin a lot this year, and we always love to have friends join us!
Just wanted to pass on a great deal!
 
Leave a comment

Posted by on November 14, 2011 in Skiing


Friday Fun Video: Kiteboarding Wake Up Call

I must say, kiteboarding never looked as appealing as it does in this movie.  Cameron makes it look like a piece of cake here.  And not only that, a seriously thrilling piece of cake.  It’s official, kiteboarding just got added to my bucket list!

Friday fun video is a weekly series where we post videos of kids doing amazing things.  Watch them.  Be Impressed.  Be inspired.  Get out and play!

 
1 Comment

Posted by on November 11, 2011 in Friday Videos


Tags:

Emergency Preparedness: A great excuse to get more gear

For some reason, this year has been the year of power outages around here.  Normally, the power rarely goes out, but this year we’ve had several times when the power’s been out for hours at a time.  Okay, I know that’s not a HUGE deal, but when you have a hungry family, it kind of feels like the end of the world (why does our power always go out around dinner time).  These are the times when we’re grateful that we have good camping gear.

Screen shot 2011 10 30 at 9.47.40 AM Ski NewsPhoto found here

Two weeks ago, our area got our first snowstorm.  AWESOME!  Except it had been so warm that many trees had not lost their leaves yet, and branches were breaking all over the place.  Just after lunch, the power went out.  As the sun set and temperatures began to drop, the power was still not on.  Not wanting to pay to eat out, we cracked open a window and cooked on the camp stove.  That night while all our neighbors were using candles or flashlights, we used our Coleman rechargeable lantern which could light up a room (dimly).  When our kids went to sleep, instead of worrying about them freezing, we put on their beanies, and tucked them into their awesome North Face mummy bags.  The next morning when we woke up, the power was back on and the house was toasty again.  Would we have been fine without all of our camping gear?  Probably.  However, having everything that we needed for an emergency, on hand, kept us calm and cool.

Although this is the off season for camping, it’s a great time to evaluate what your family has and what you might need, both for camping and emergencies.  For us, it’s sometimes difficult to justify spending money on gear, but if it is multi-functional, it’s easier to justify.  Here are a few pieces of gear that we think are important to have on hand for an at home emergency (even if you don’t plan on camping):

  • a warm sleeping bag
  • flashlights and extra batteries (a lantern is a bonus, but not necessary)
  • a camp stove with extra fuel (we usually keep at least 6 canisters on hand)
  • first aid kit
  • multi-tool/pocket knife
In addition to that, it’s important to have food and water on hand in case you cannot leave your home or the stores aren’t open (that happened a few years ago here).  We have a large amount of food in storage and keep enough drinking water on hand to last our family 2 weeks.
The Department of Homeland Security also recommends that every person have, at very minimum, a 72-hour kit.  At the very least, your 72-hour kit should contain the following (found here):
  • One gallon of water per person per day. This means at least three gallons of water per person.
  • Sufficient non-perishable food for three days. Ideally, these foods will be lightweight and high in energy. If you pack canned foods, remember a can opener!
  • Prescription and non-prescription medications. Include a spare set of glasses, if you need them.
  • Battery powered portable radio. This may be your only source of information during a disaster.
  • First aid kit. The small camping kits work well. Remember to get enough supplies for the number of people who may be using them.
  • Personal hygiene items.
  • Clothing and bedding. A spare pair of socks and a space saver blanket would be a minimum.
  • Special items such as baby needs or contact lens supplies, etc.
  • Personal comfort items. Books, games, personal electronics, etc.
Additionally, the Department of Homeland Security has a more detailed list found here.  With winter upon us, being prepared in an emergency is essential, especially if the weather is bad.  Although you cannot prevent emergencies, you can prepare for them, and stock-up your gear stash along the way!
 
1 Comment

Posted by on November 10, 2011 in Fear, Ideas, Tips


Photo of the week: Never too young

It’s like he was born to love rafting.  Can’t wait until he can handle bigger water with us!

 
2 Comments

Posted by on November 8, 2011 in Photo of the week


Tags: